Color Grading Function
The Neka editor's color grading function uses the gradient mapping principle, which works well for images with a clear distinction between light and dark (black, white, and gray). During the drawing process, be sure to distinguish between light and dark lines and color blocks if you plan to use the smart coloring function.(Gradient map also works well for messiness painting styles)
Gradient Map Introduction
Here is a brief introduction to gradient maps. For those one who already know it, please skip to the second step of the editor coloring guide directly.
At the beginning, prepare an image material to demonstrate how the gradient map is colored:
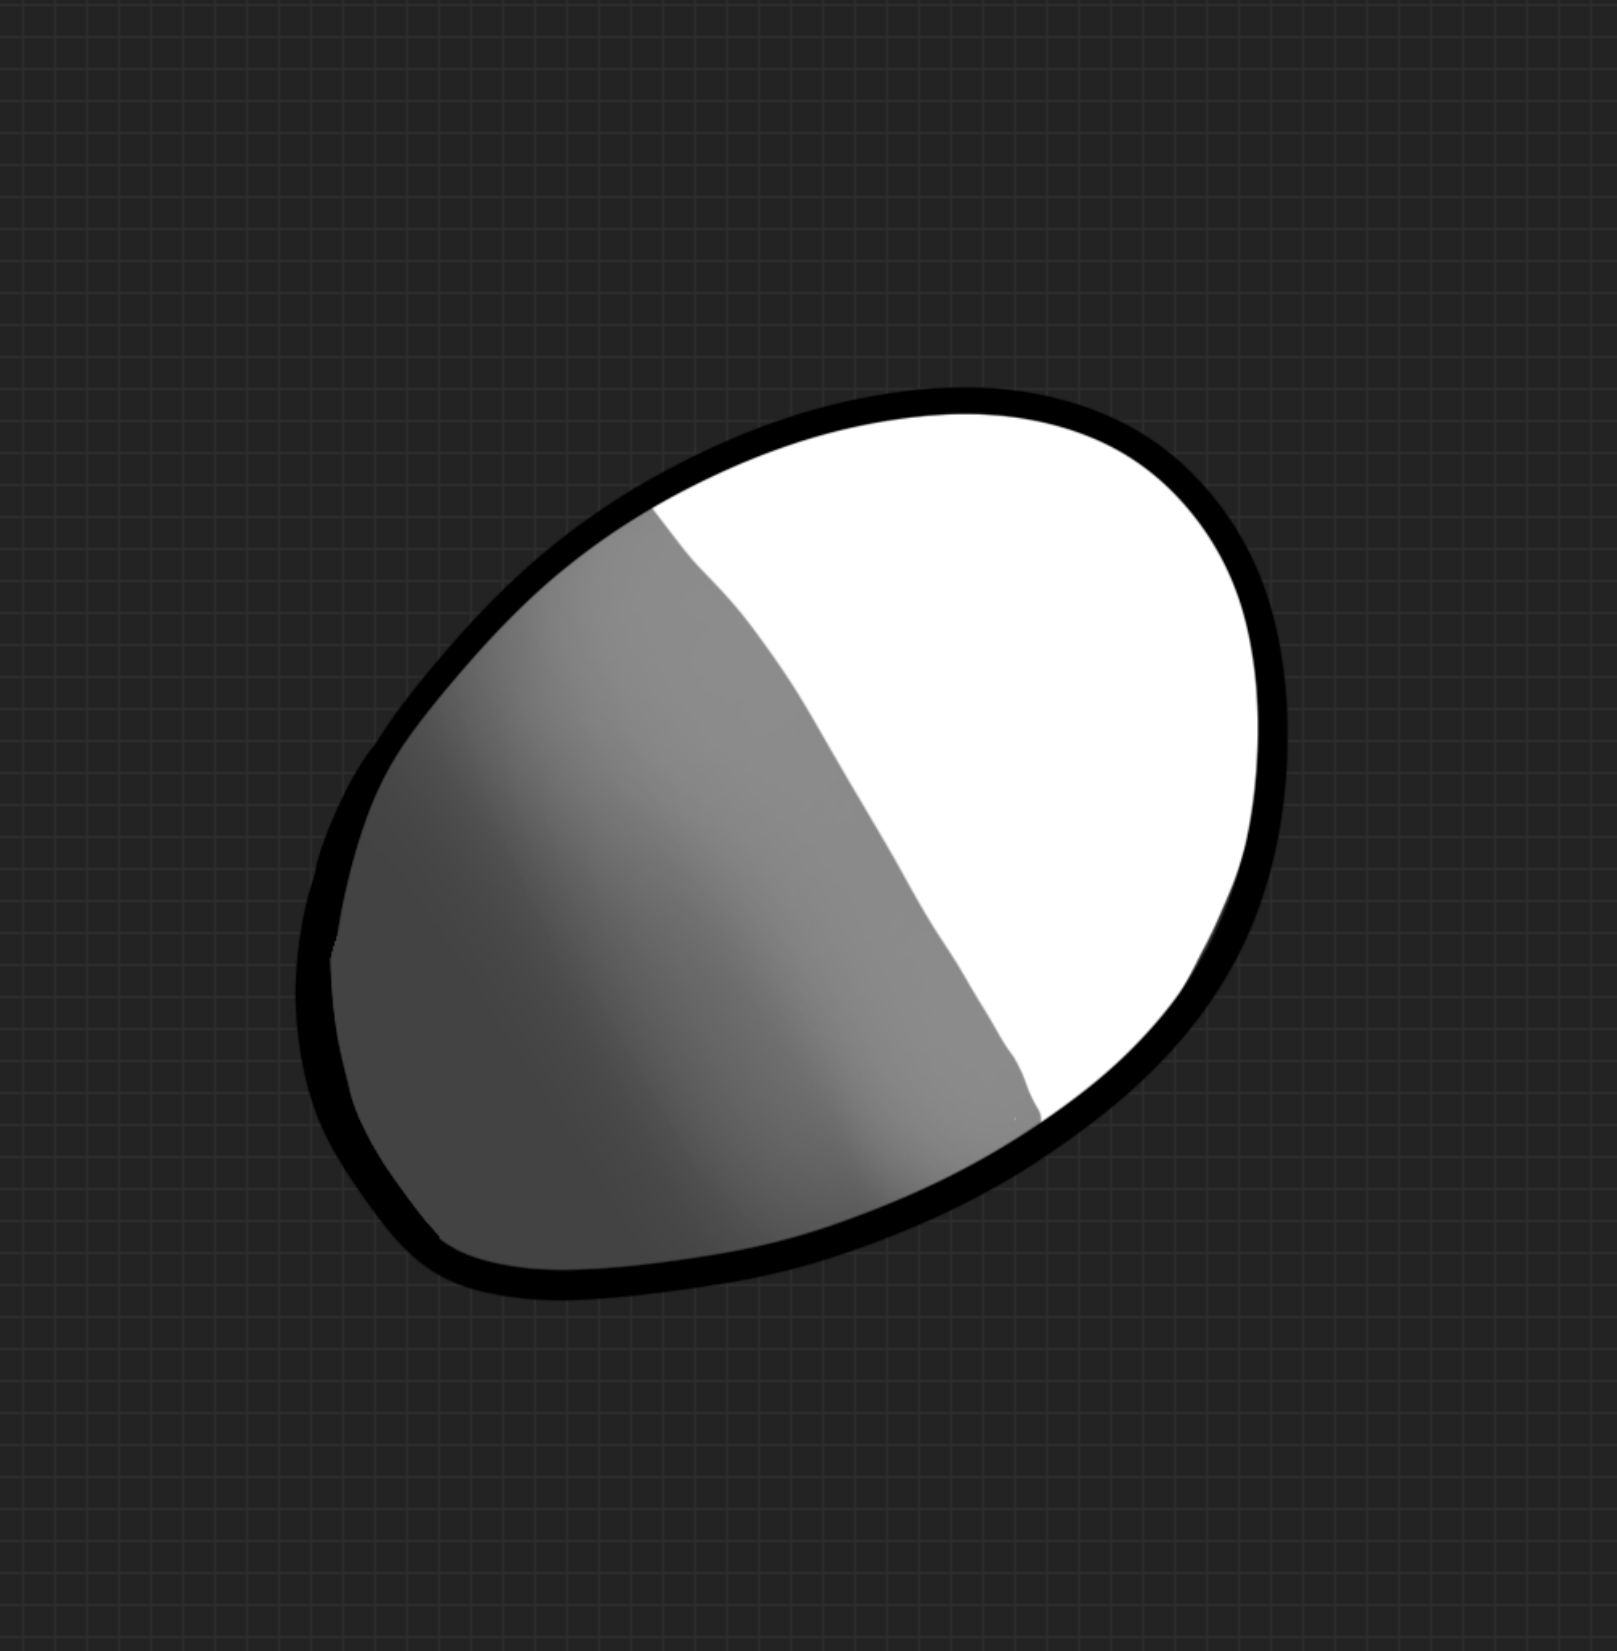
In this case, we have drawn an oval with pure black lines, filled with pure white on the right side, made a transition gray on the left side, and the rest is transparent.
So, in this image, the line on the outside is the darkest part (brightness = 0) and the white on the right is the brightest part (brightness = 100).
Now, creating a gradient-mapped palette:

As shown in the figure, this is a gradient bar.
The leftmost block corresponds to the area with the lowest brightness (0), and the rightmost block corresponds to the area with the highest brightness (100).
Basically, the transition from left to right is Dark > Midtone > Highlight.
We set the left color block is dark green and the right color block is pure white.
The Gradient map is to map the original image into the colors on the gradient bar according to the light and dark relationship.
Here's how this palette is applied to the image:
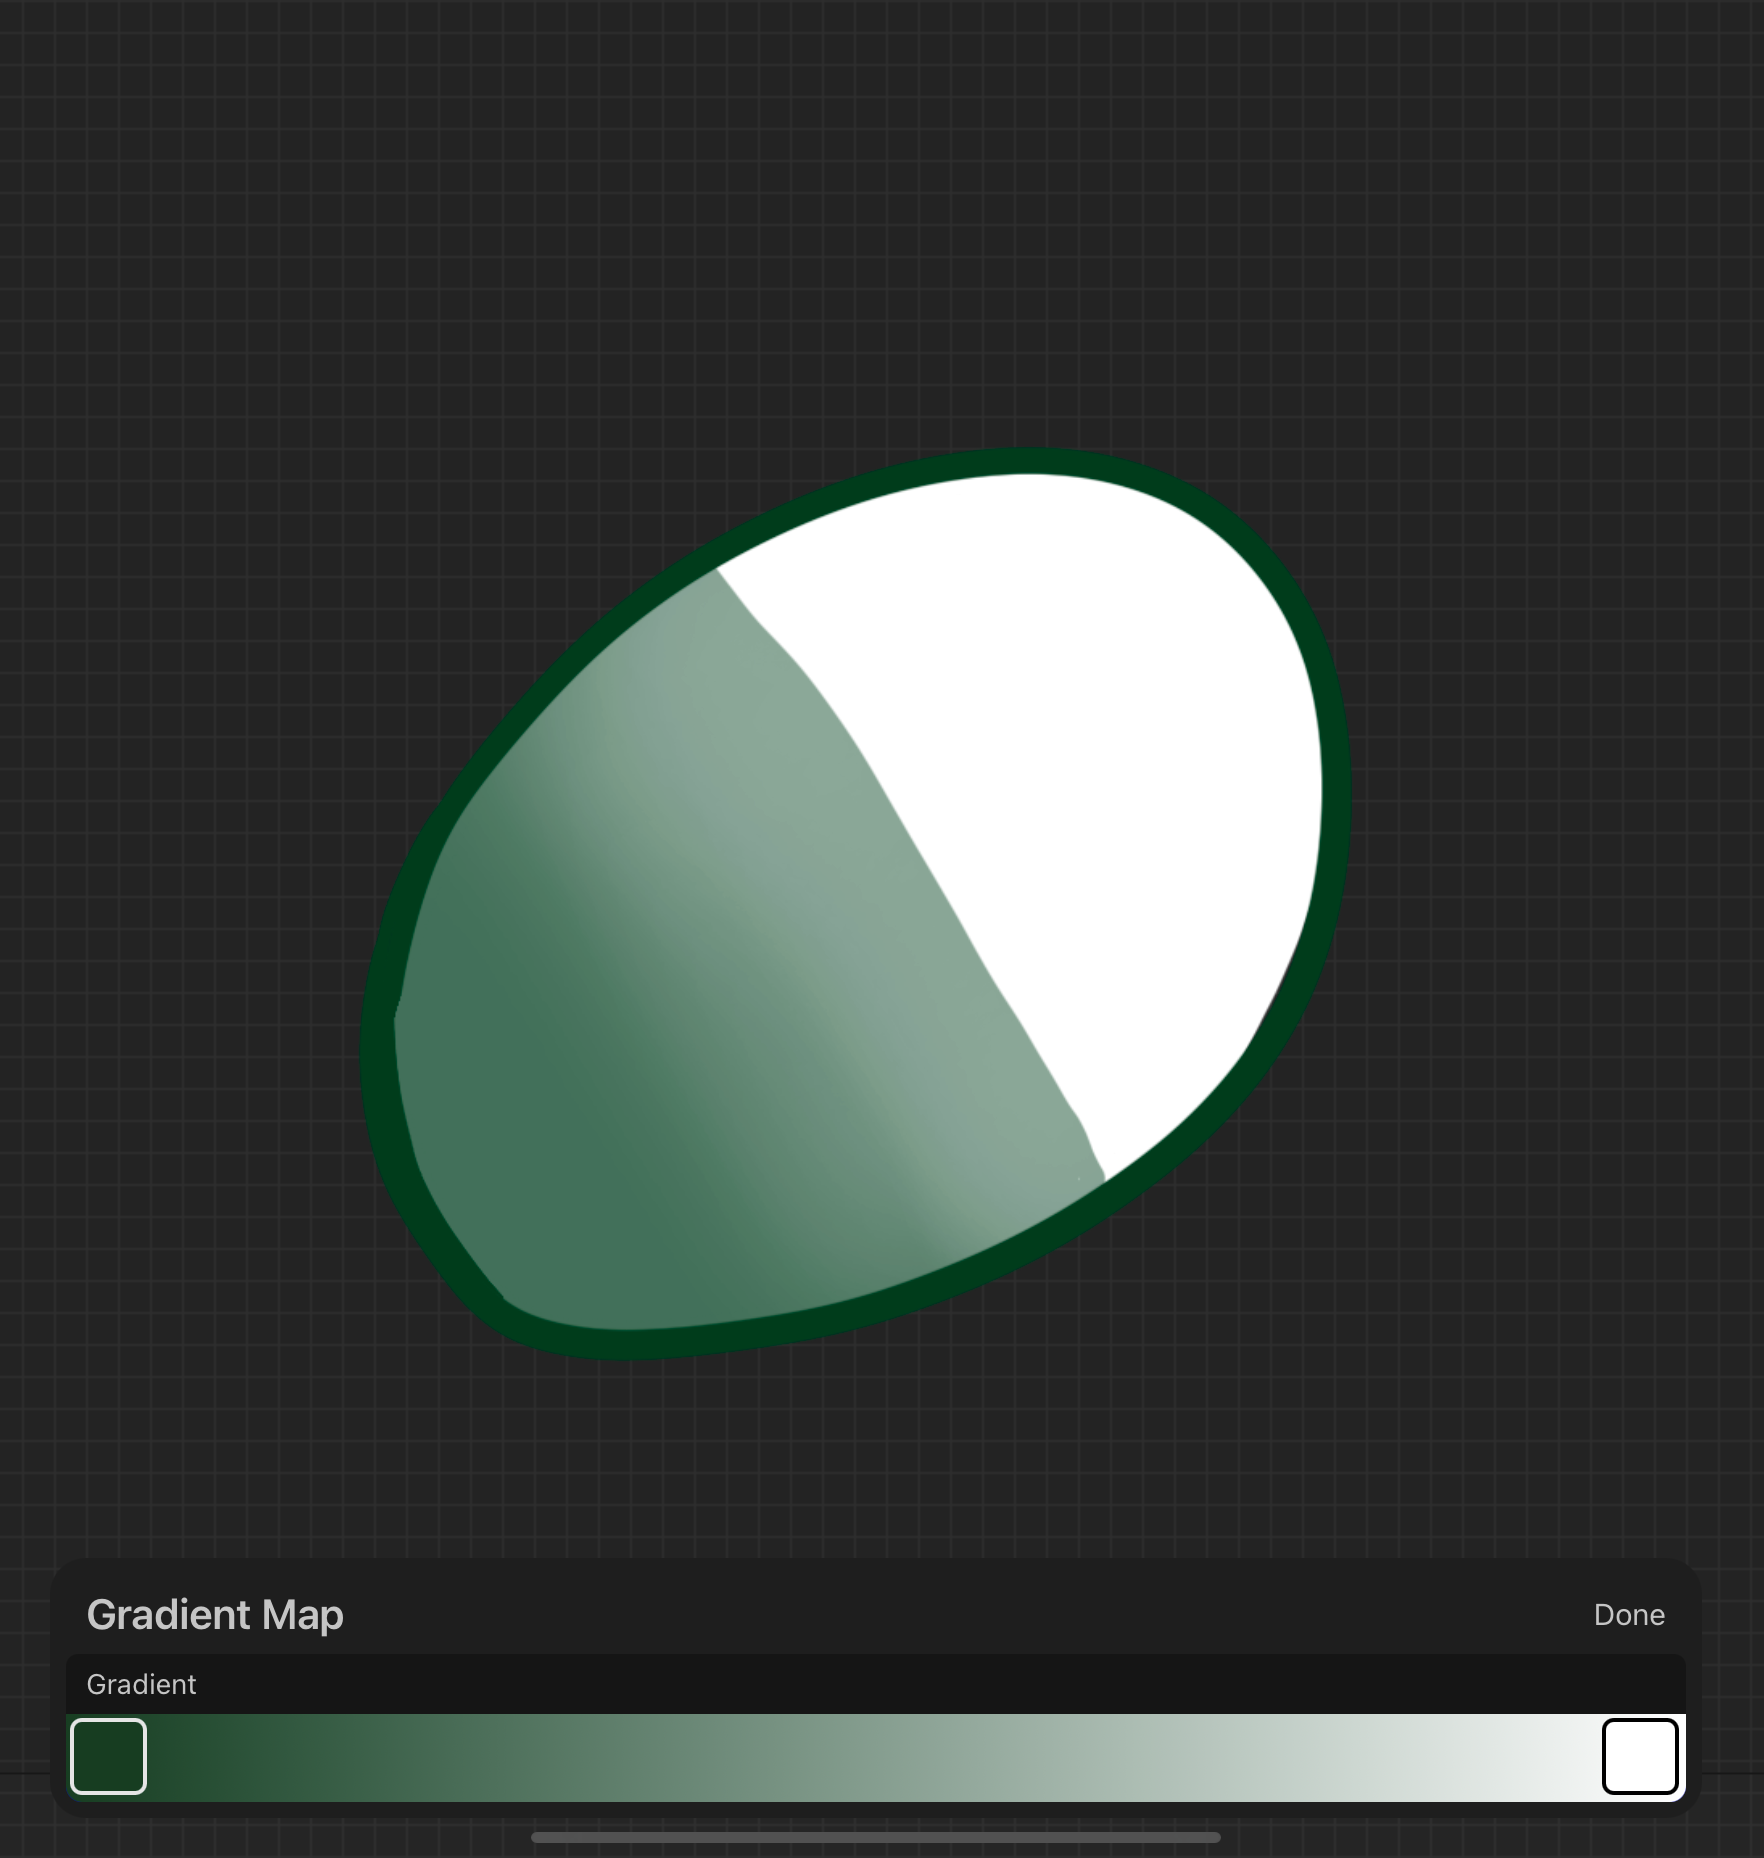
We can see that the original black line becomes a dark green on the leftmost color block, the white part remains the same, and the gray part is the transition from dark green to light green, which exactly corresponds to the color of the gradient bar.
If more color blocks are added to the transition area of the palettes:
The gray area of the original image is changed by the middle block on the palette.
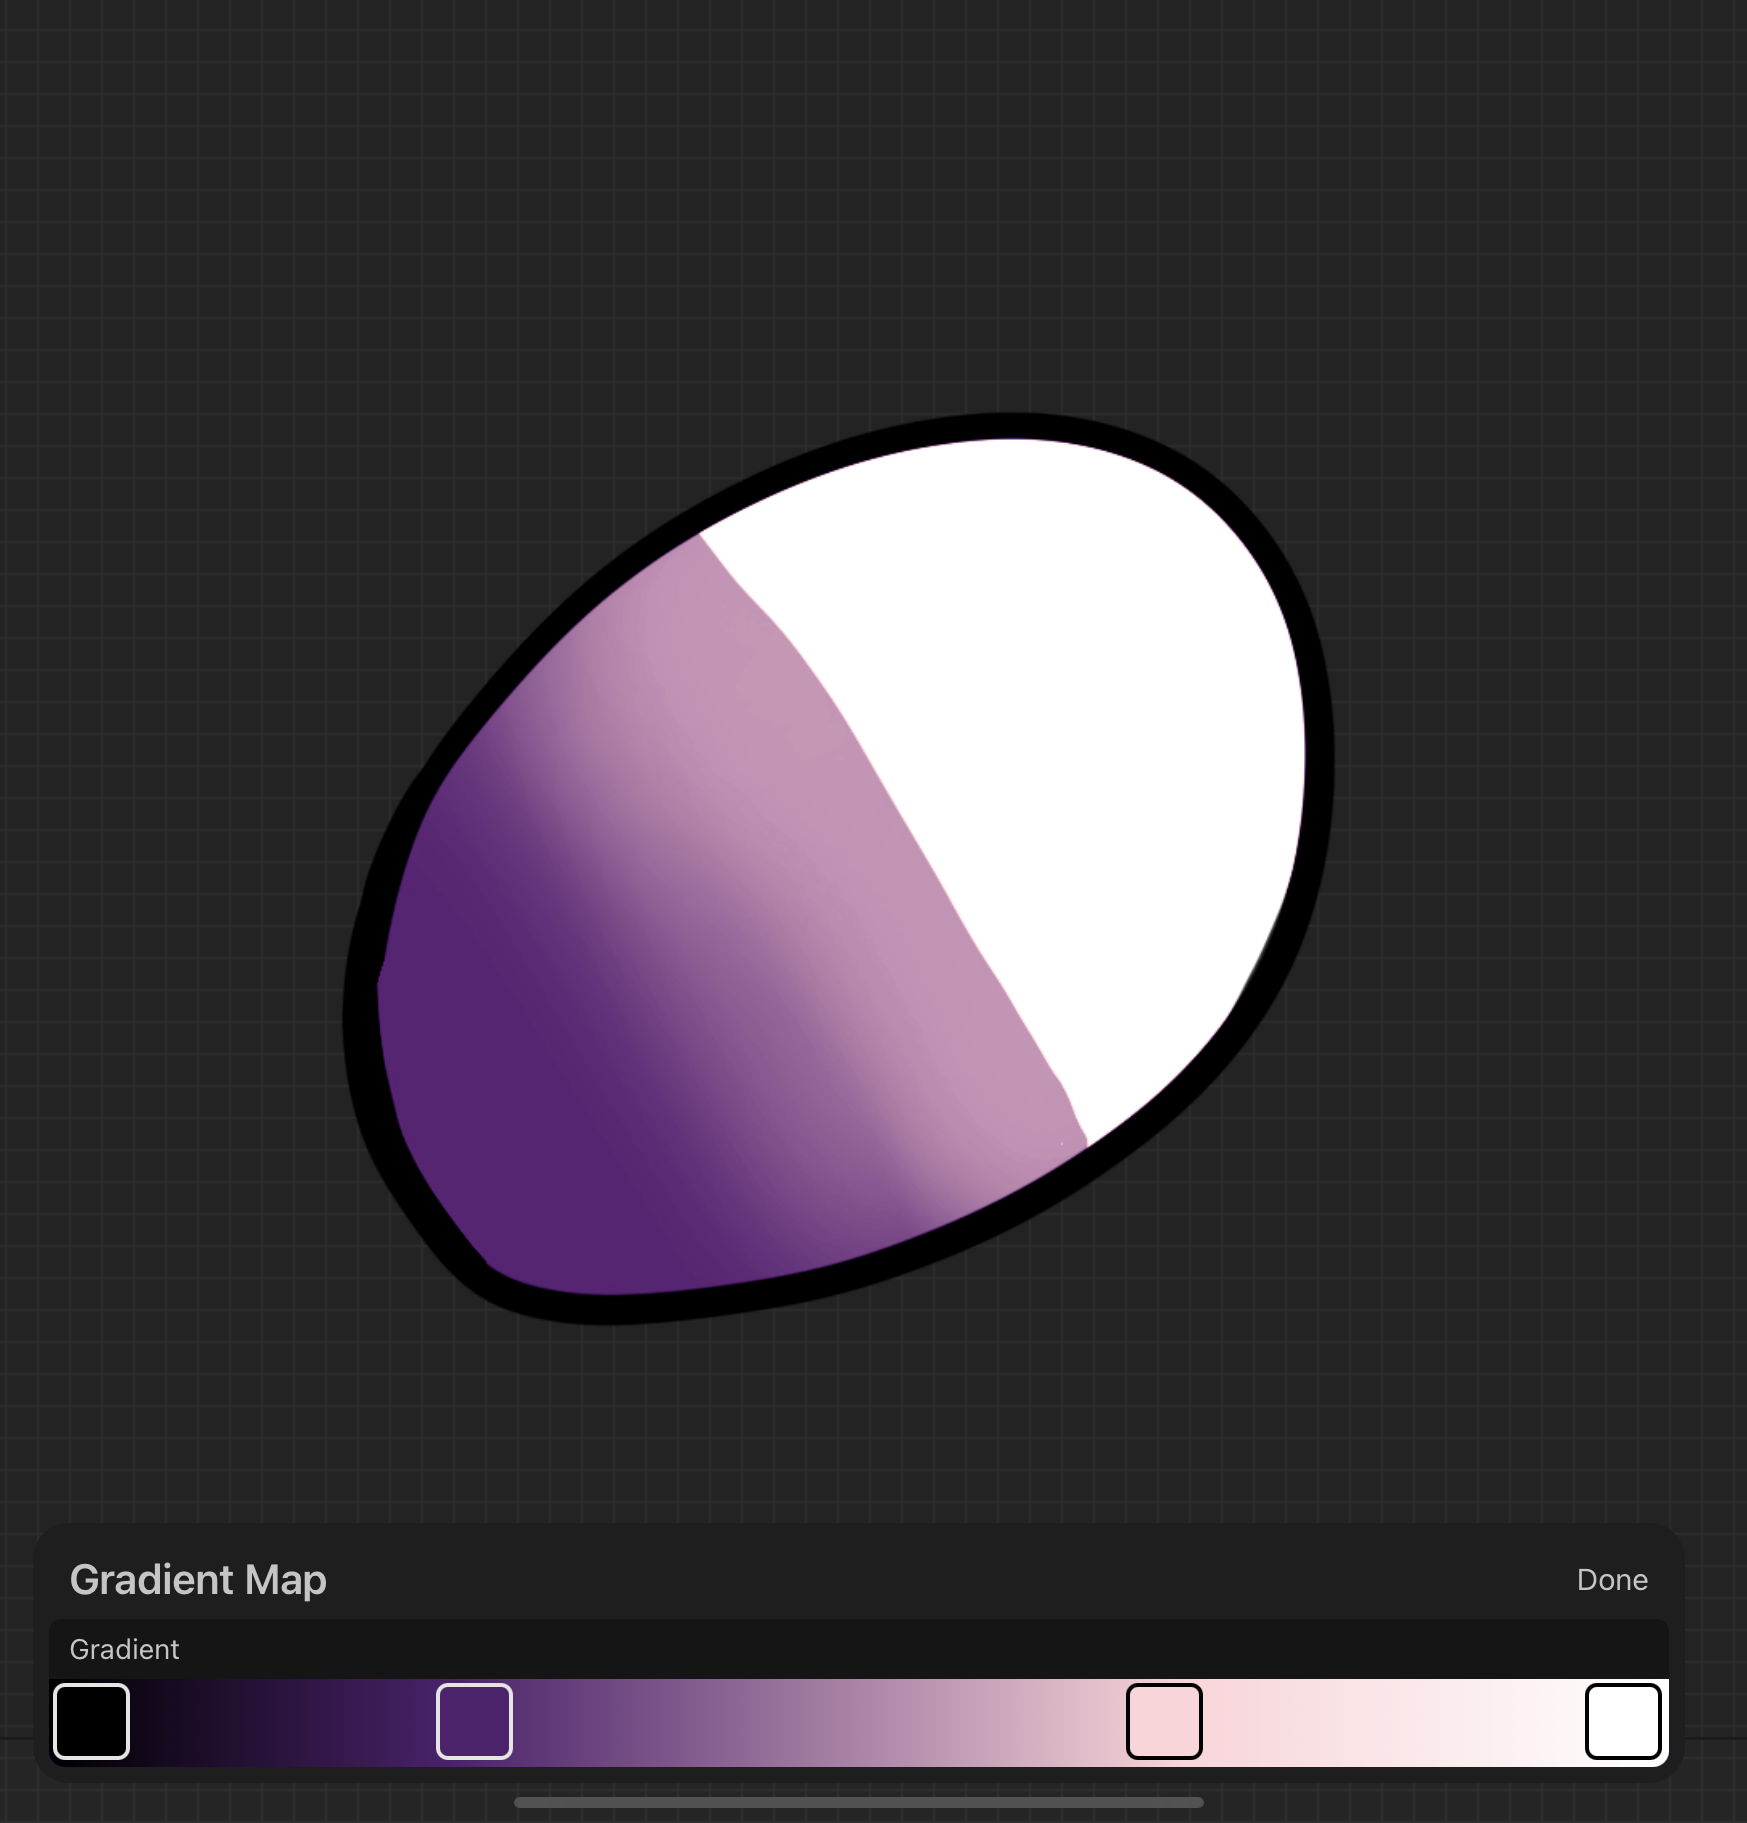
Next, Change the color of the left and right blocks and add more blocks in the middle:

Colors become blindingly bright...... But the dark, light, and gray areas retain their original hues.
How to make all the areas inside the line drawing the same color?
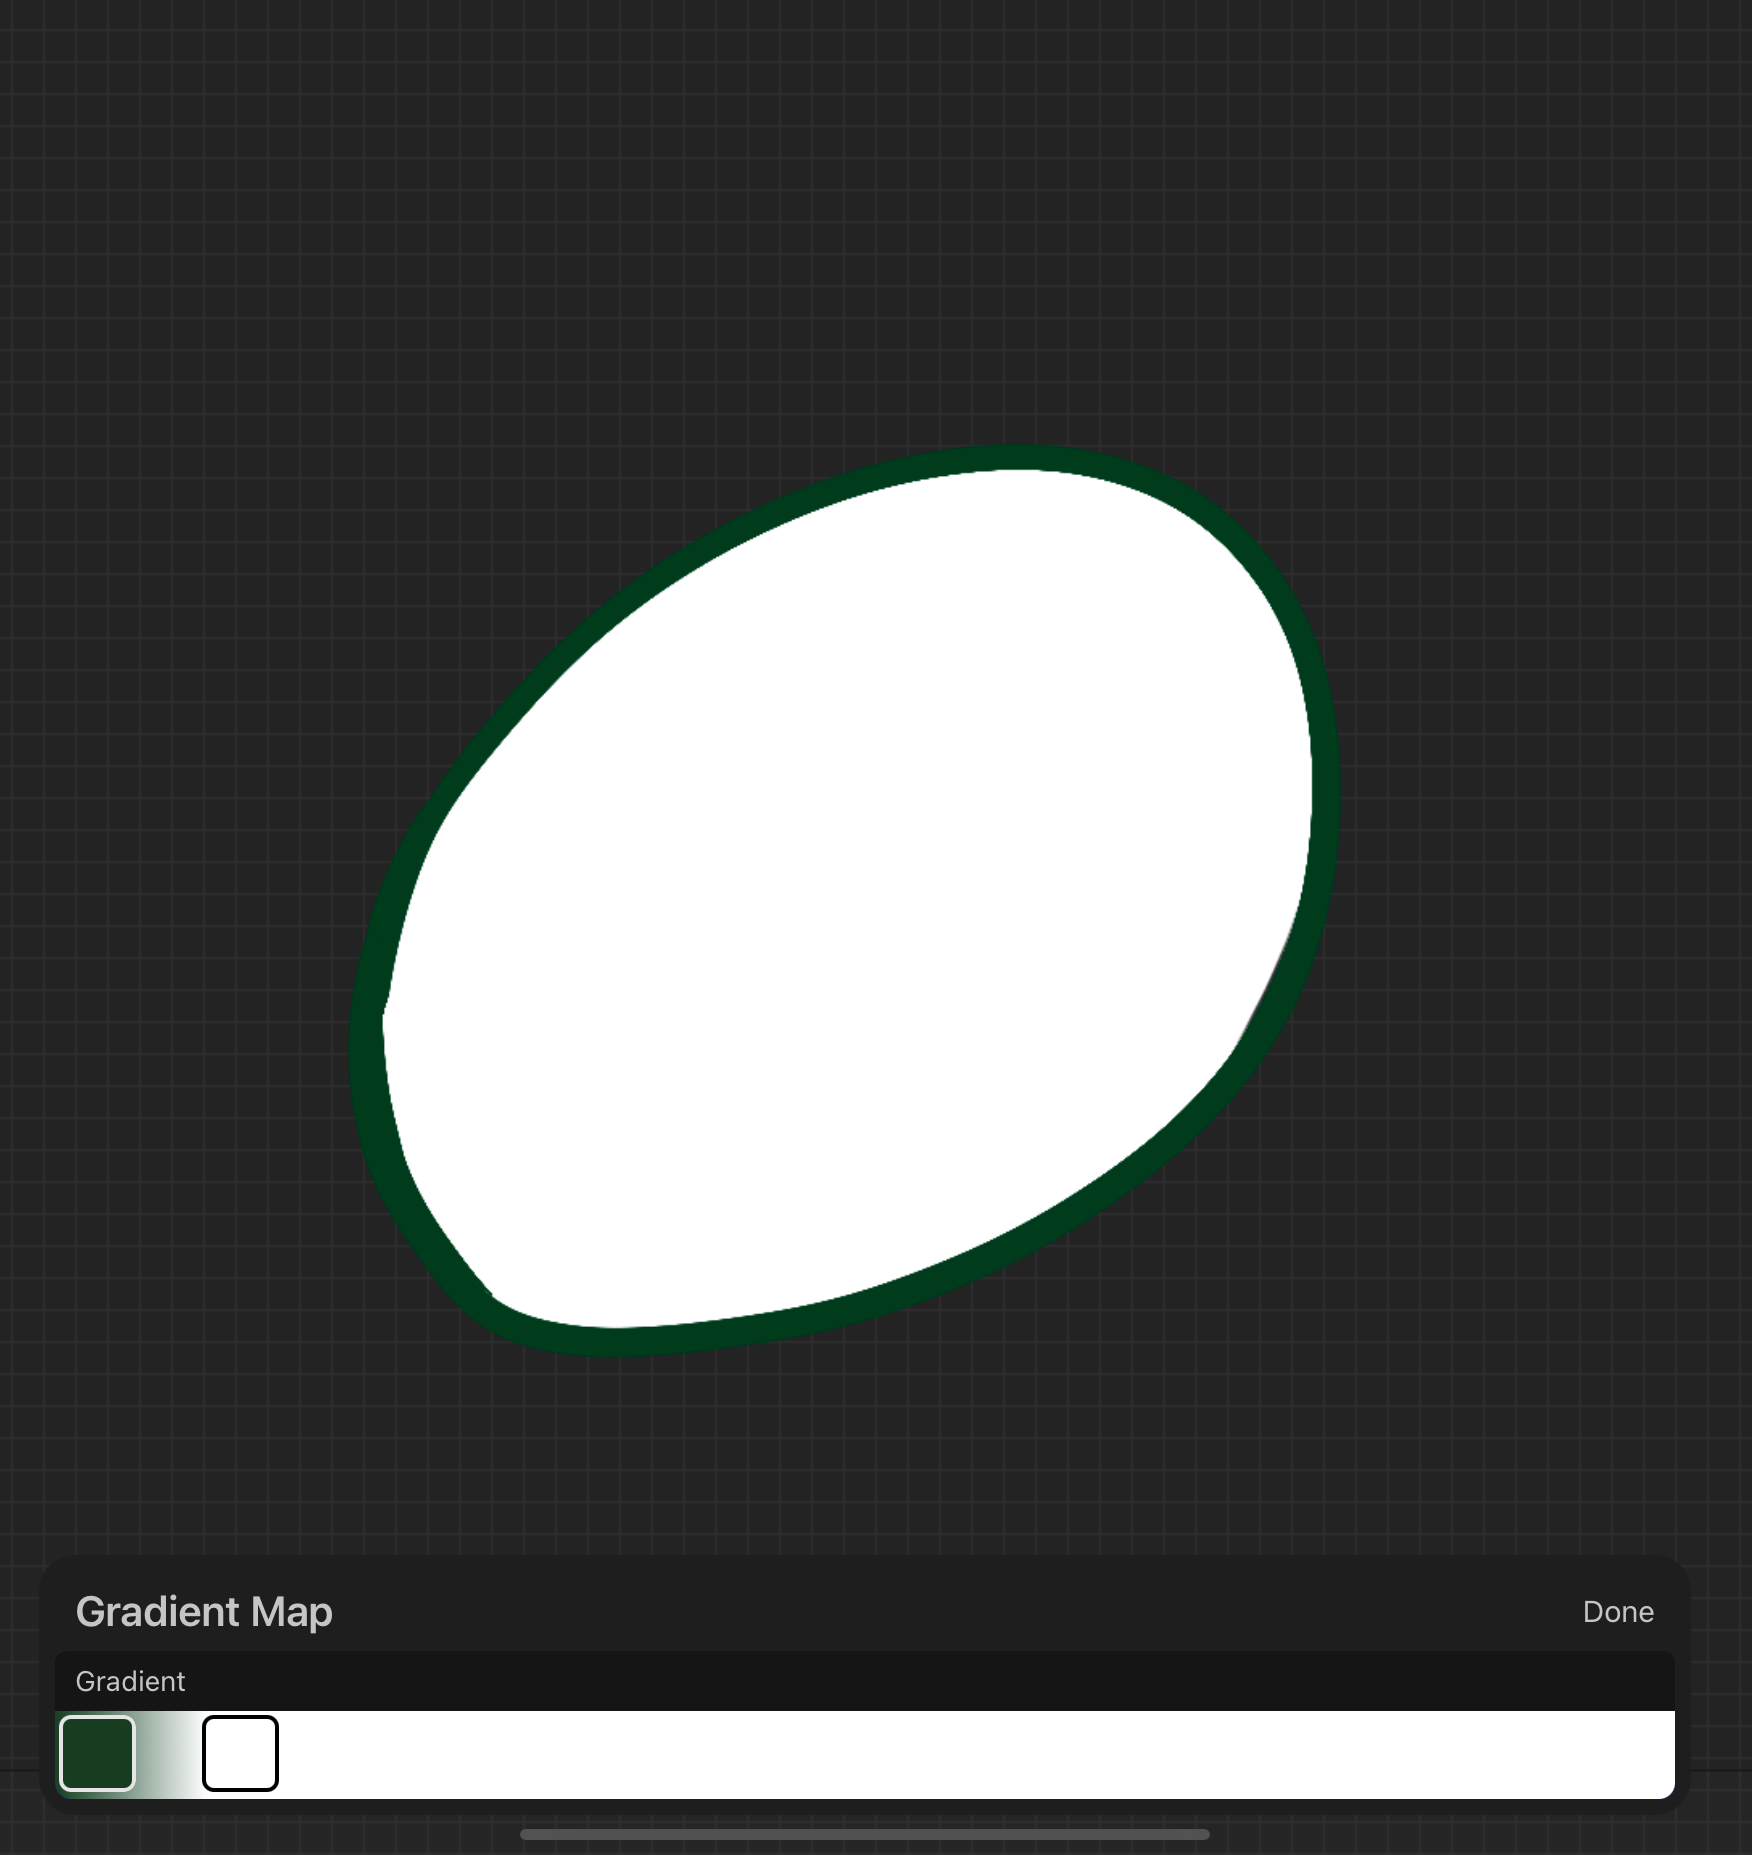
As shown in image, when you pull the right color block infinitely closer to the left, all the parts of the picture become white, except for the darkest green part.
Based on the above case, I believe you have already understood the gradient map coloring principle, followed by a tutorial on how to use the coloring function in the Neka editor.
Editor color grading Tutorial
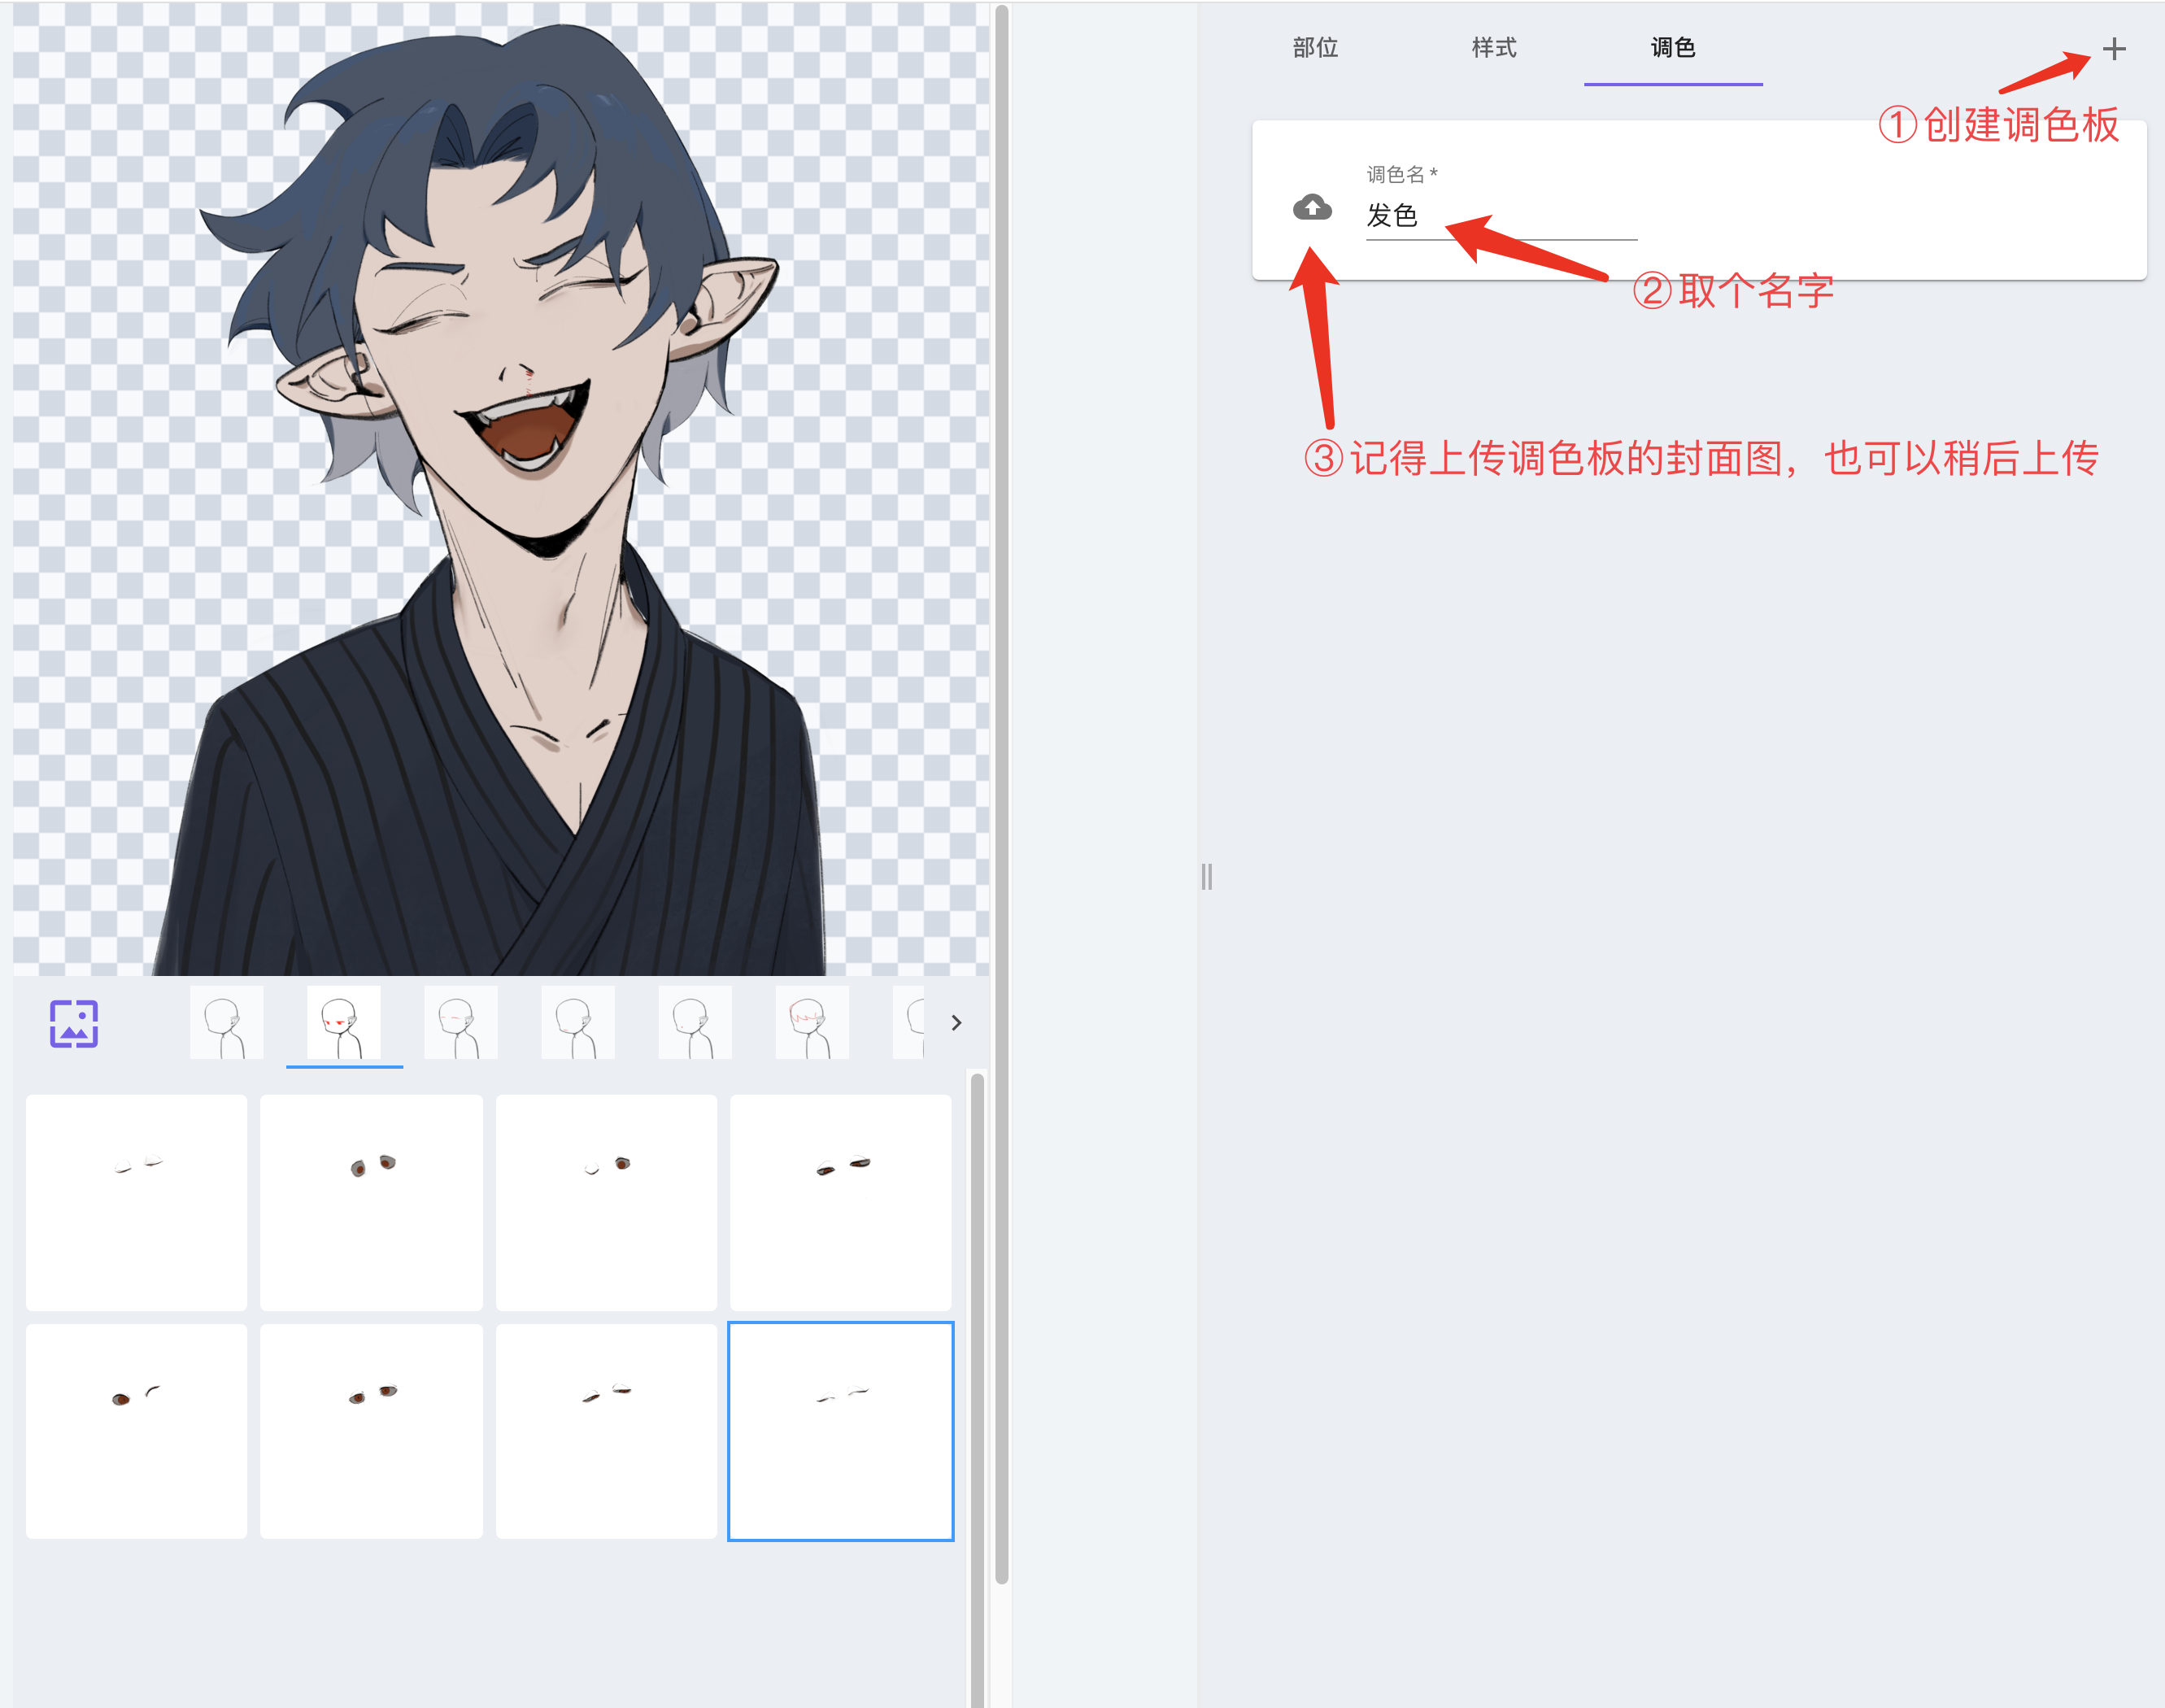
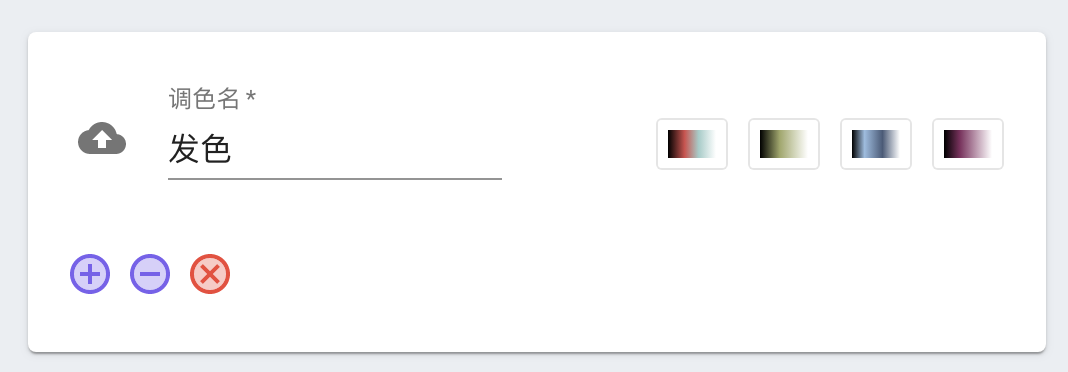
- In the beginning, make a palette and name it based on your purpose, such as i want to color one’s hair, I would name the palette "Hair Color.
Find the parts that need uniform color changes and assign them to the color palette.
For this example, we need to change the color of the hair, so the front and back of the hair will be associated with the "hair color" palette. (It doesn't matter if there are sideburns, extensions, etc., as long as you need to link to change their color, they are associated.)

- Go back to the palette which you just created, clicked (click on the blank space to expand it, then you can see the "+")to add a new color,


- Tap on this color, a gradient bar will appear. Then click on the slider above, you can color your hair directly (click on the slider to change the color and delete the color swatch, click on a different position of the gradient bar to add a new slider).
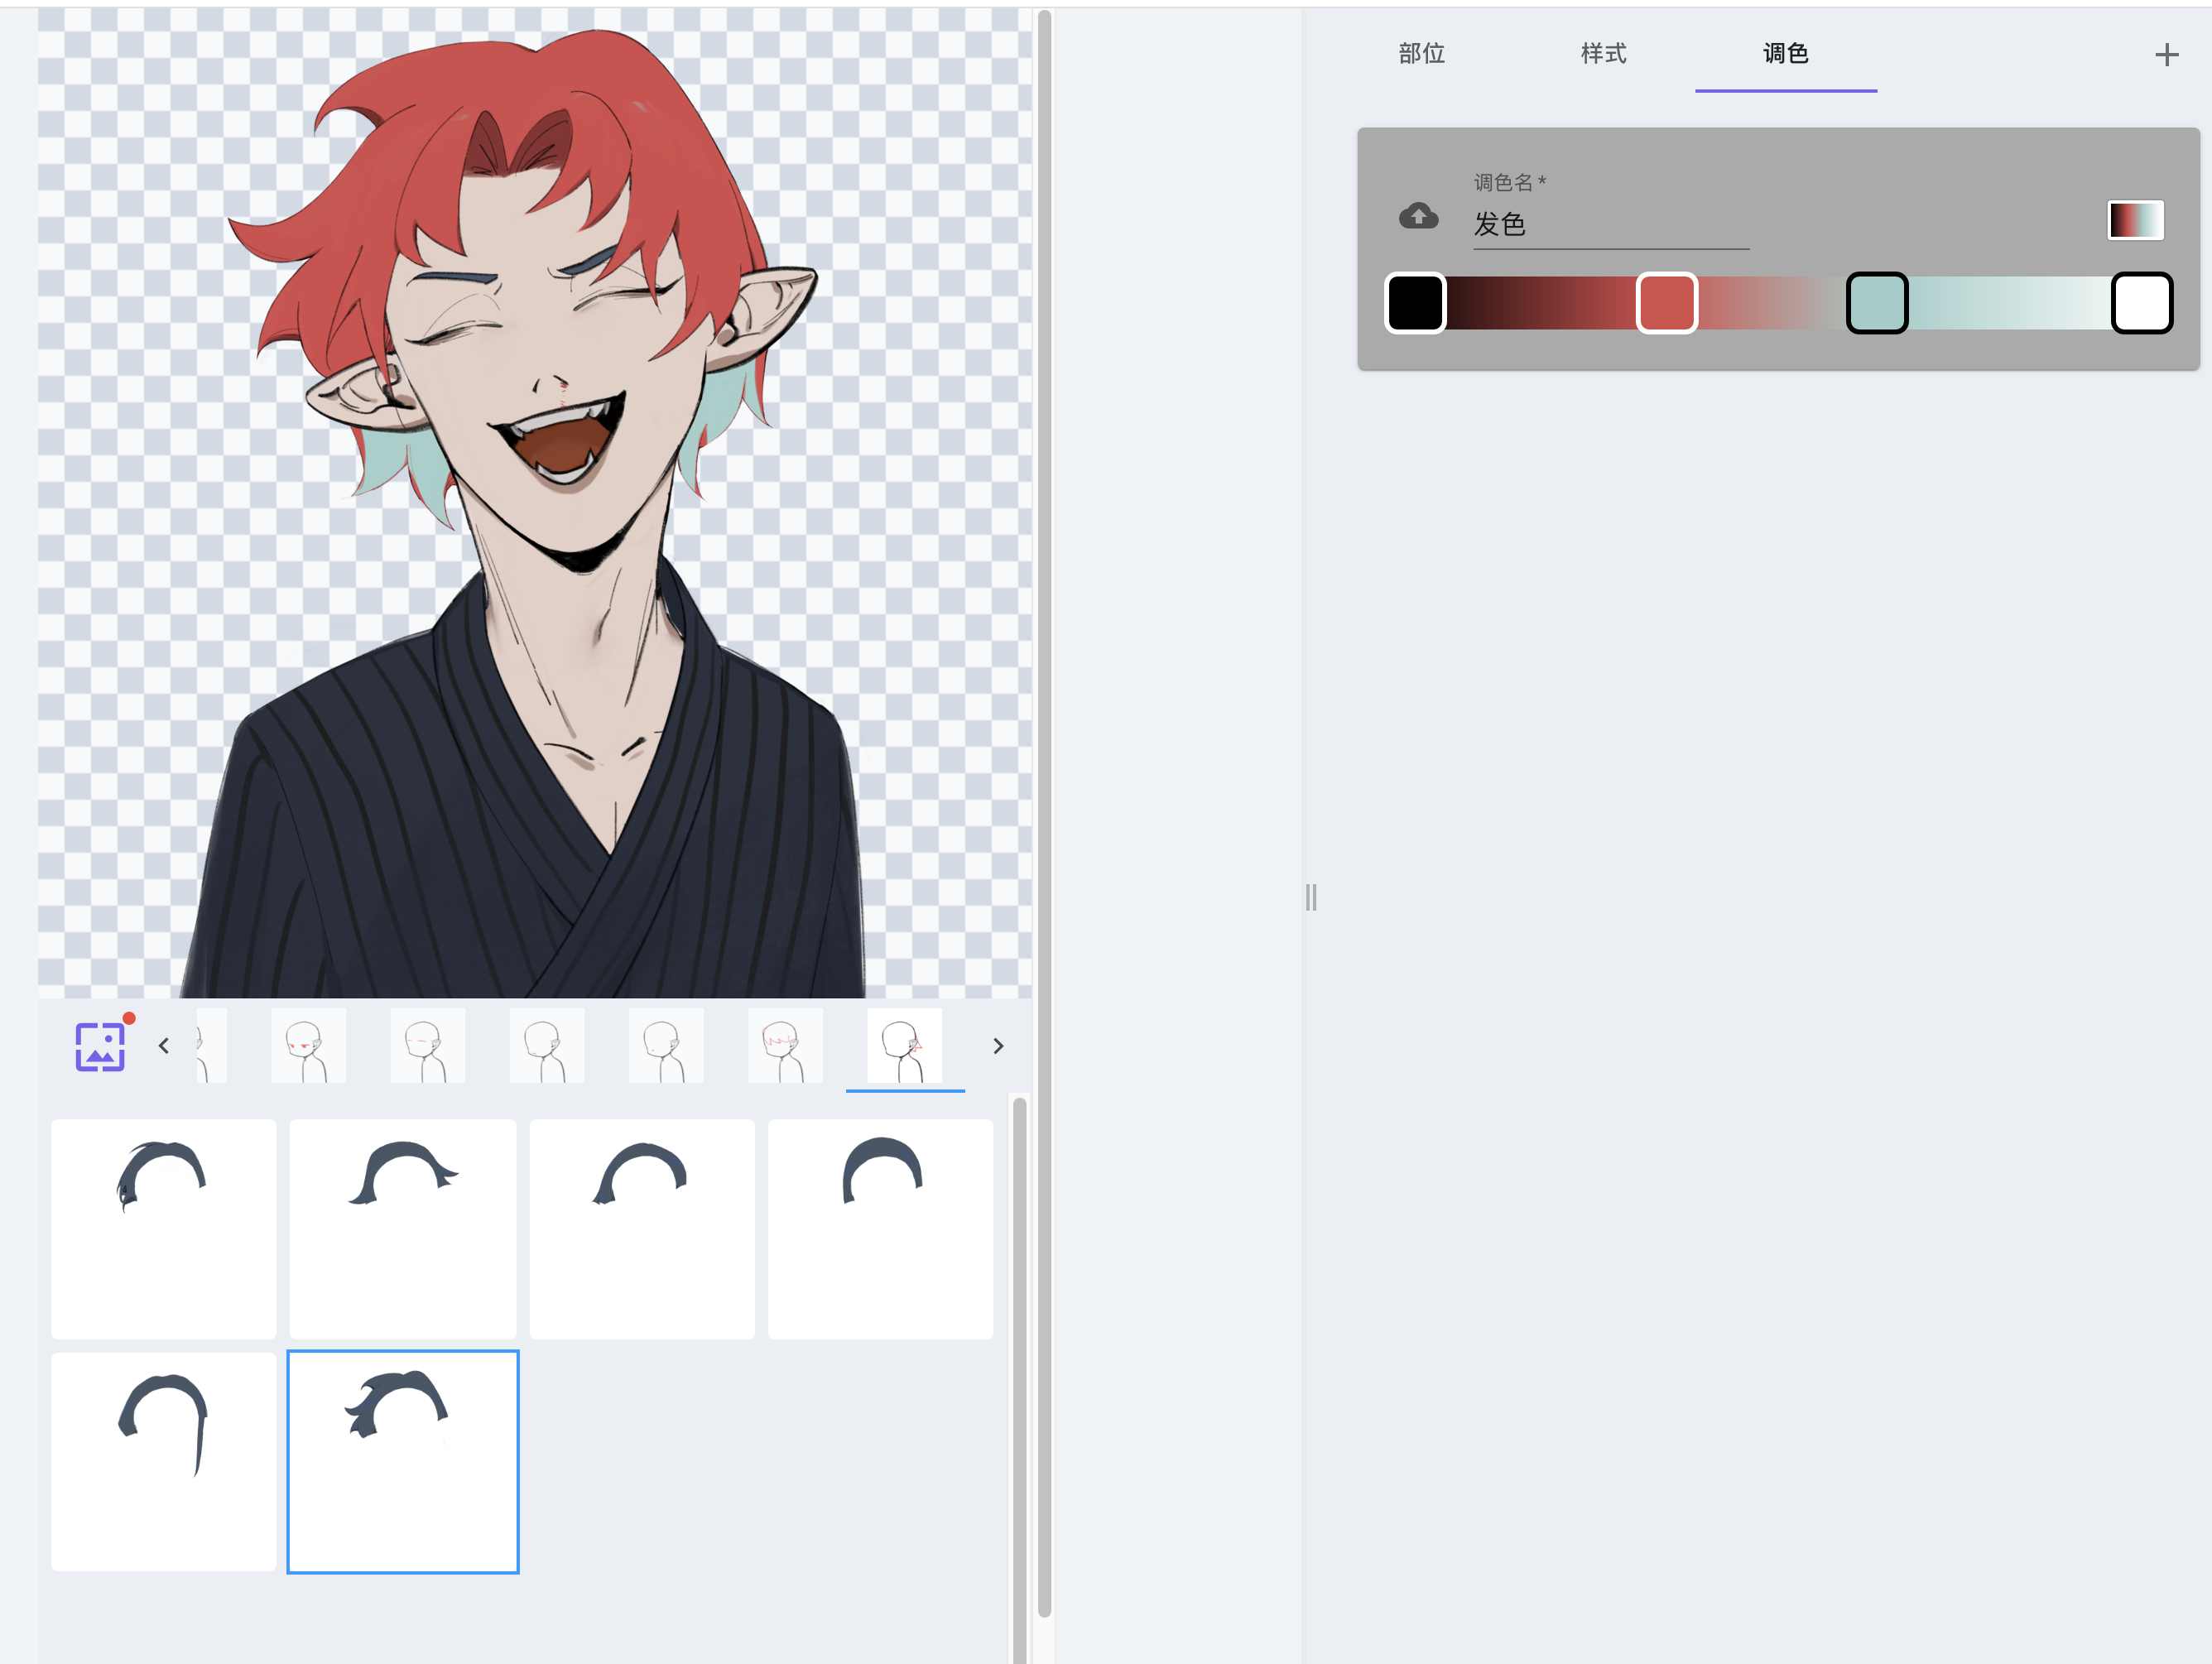
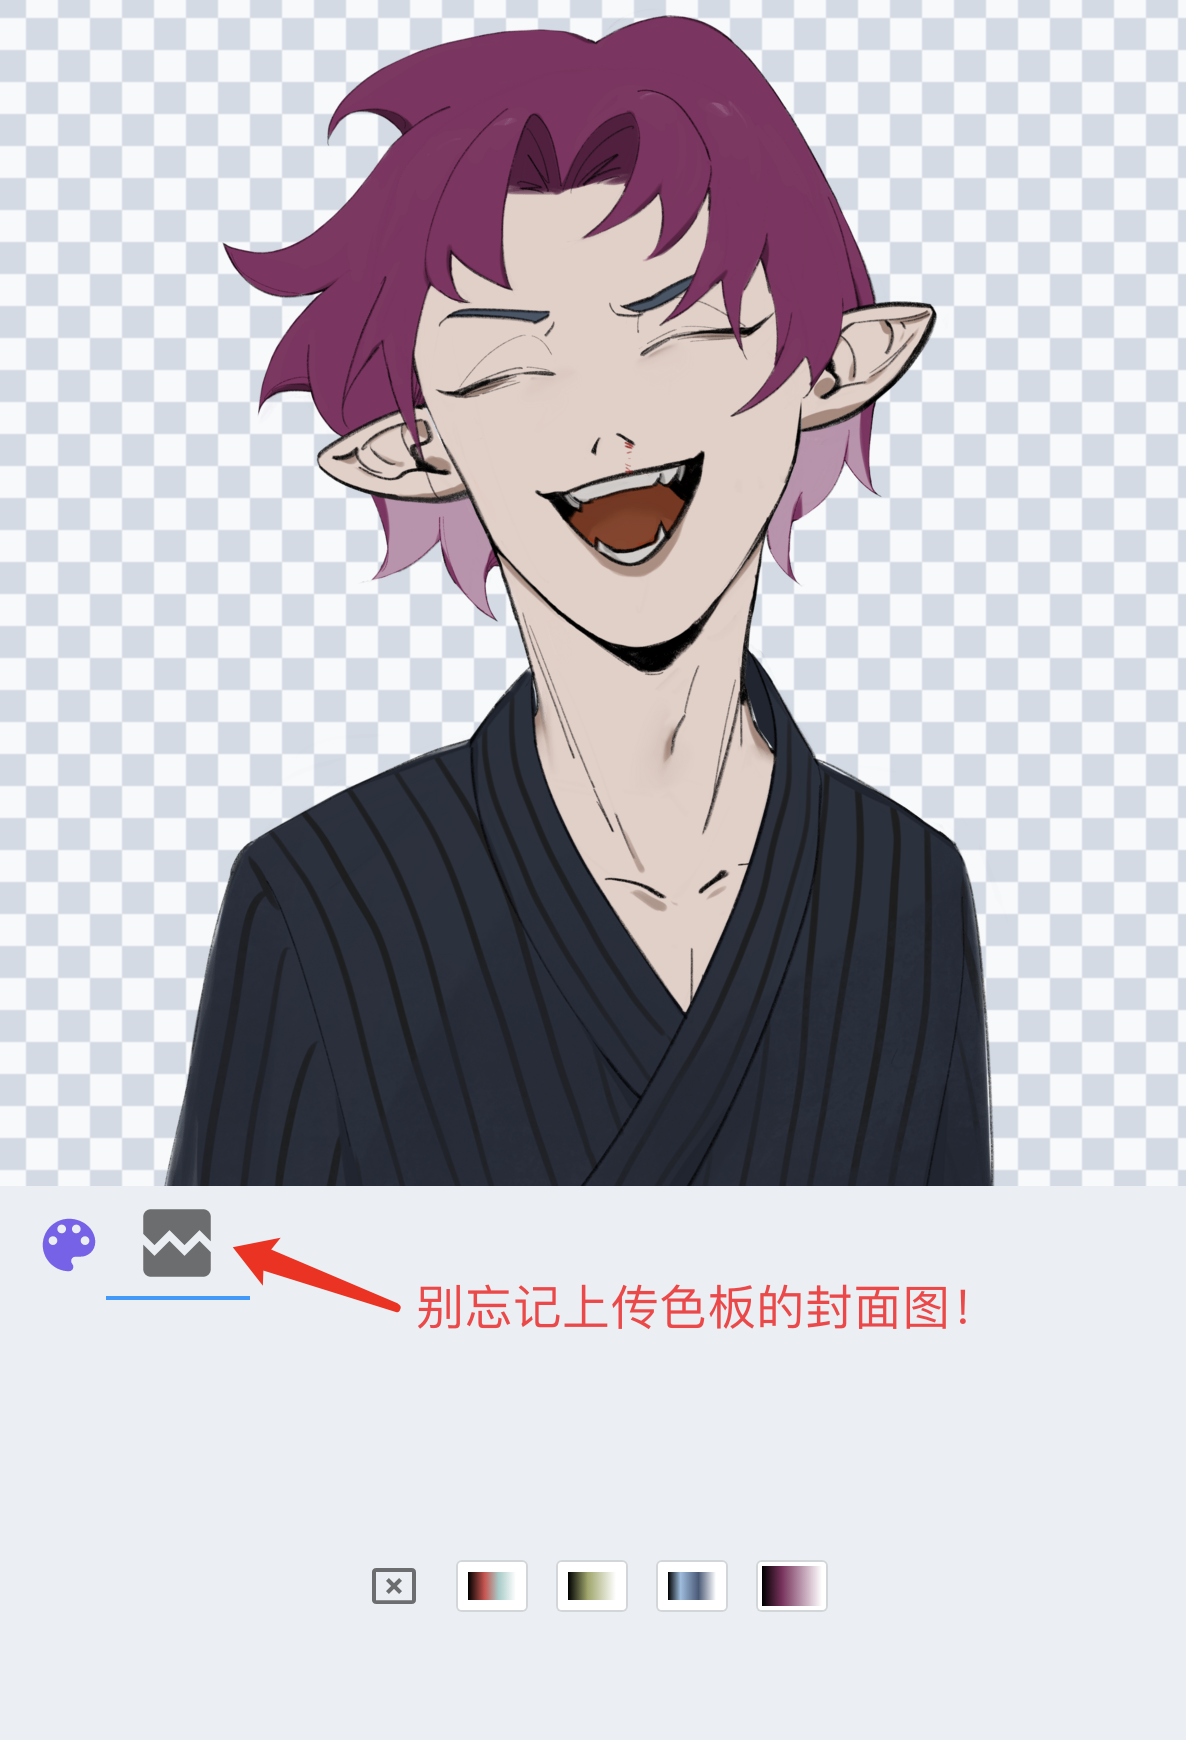
- Add more colors to the swatches and test them in the debug area.

Effects:

*Functions update: The editor now supports color grading in layers. In situations where different color swatches are needed in different areas, such as eyes needing to adjust eyelashes and iris separately, or clothes needing to adjust certain accessories and patterns individually, you can associate different color swatches to different layers.